Tap Settings → Date & Time (any Display Mode).
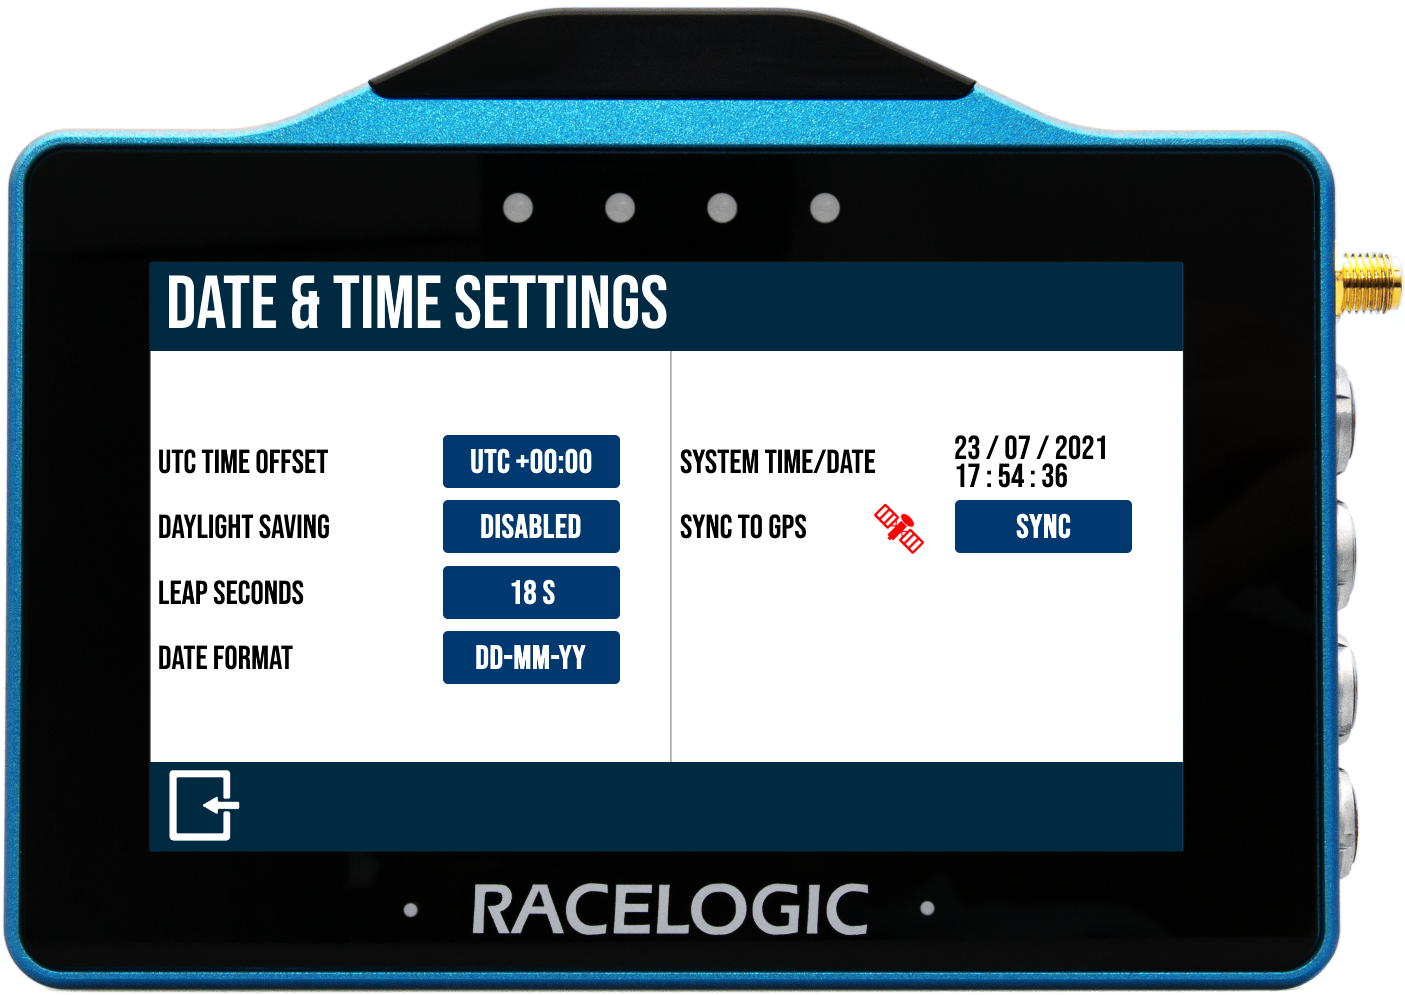
The UTC offset value is set as '+00:00' by default.
Change it by tapping the UTC Time Offset button and use the Plus (+) and Minus (-) buttons to select the desired time zone offset values (including available 30 and 45 minute offsets).
Pressing and holding a button will fast-scroll through available valid time settings.
Minimum: -12:00; maximum: +14:00.
Save the new offset value by tapping the Confirm button in the bottom right corner of the screen. Tap the Cancel button in the bottom left corner of the screen to return to the Date & Time Settings screen without saving a new offset.

NOTE
The setting cannot be changed if the unit is moving or logging, if you try and change the setting a warning message will appear.
This option is Disabled by default.
When Enabled, this setting adds +1:00 hr to the local time setting.

This option is Disabled by default.
When Enabled, this setting adds +1:00 hr to the local time setting.

NOTE
The setting cannot be changed if the unit is moving or logging, if you try and change the setting a warning message will appear.
The leap second value is set as '18 s' by default.
Changed it by tapping the Leap Seconds button and using the presented keypad to enter a new leap second value (maximum input value is 99).
Save the new leap second value by tapping the Confirm button in the bottom right corner of the screen. Tap the Cancel button in the bottom left corner of the screen to return to the Date & Time Settings screen without saving a new ;eap second value.

NOTE
The setting cannot be changed if the unit is moving or logging, if you try and change the setting a warning message will appear.
Change the date format between DD-MM-YY (default) and MM-DD-YY by tapping the button.

Change the date format between DD-MM-YY (default) and MM-DD-YY by tapping the button.

This displays the current time and date being used by the system.
They are displayed within the .vbo header file, file date created time stamp, the acceleration history results session header, deceleration history results session header, laps history filename and the gates file (.spl) header.

This displays the current time and date being used by the system.
They are displayed within the .vbo header file, file date created time stamp, the acceleration history results session header, deceleration history results session header, laps history filename and the gates file (.spl) header.

NOTE
The time/ date displayed by the unit may be inaccurate until a valid satellite lock is achieved. The unit will then update to the correct time/date as long as the unit is not logging.
This feature will synchronise the internal real-time clock (RTC) to GPS time as long as the unit has obtained GPS time (no GPS time is indicated by a red satellite icon), isn't moving and isn't logging.
Tap to start the synchronisation progress.

This feature will synchronise the internal real-time clock (RTC) to GPS time as long as the unit has obtained GPS time (no GPS time is indicated by a red satellite icon), isn't moving and isn't logging.
Tap to start the synchronisation progress.
