In the Logging menu, you can change the Log rate, the duration of the Stop logging delay, the Log condition, the Filename and see a Logged channel summary.


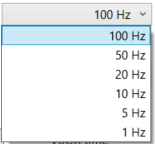
This area lets you choose between 6 log rate options:
- 1 Hz
- 5 Hz
- 10 Hz
- 20 Hz
- 50 Hz
- 100 Hz (should be used for normal operation)
500 Hz logging for Internal A/D
You can enable or disable 500 Hz logging for internal analogue inputs by using the toggle switch.
This area lets you choose between 6 log rate options:
- 1 Hz
- 5 Hz
- 10 Hz
- 20 Hz
- 50 Hz
- 100 Hz (should be used for normal operation)
500 Hz logging for Internal A/D
You can enable or disable 500 Hz logging for internal analogue inputs by using the toggle switch.
Note: 500 Hz logging for Internal A/D is only available when the Log rate is set to 100 Hz.

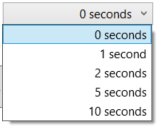
This area lets you select the stop logging delay time, with a value of:
- 0 seconds
- 1 seconds
- 2 seconds
- 5 seconds
- 10 seconds
This area lets you select the stop logging delay time, with a value of:
- 0 seconds
- 1 seconds
- 2 seconds
- 5 seconds
- 10 seconds
Note: Stop logging delay will not be available if the Log condition is set to Continuously.

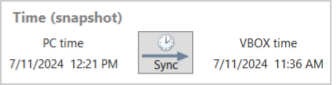
You can set the real-time clock in the VBOX unit by syncing the VBOX time to match the PC time. This time will be used for the creation date/time in the VBOX data files.
You can set the real-time clock in the VBOX unit by syncing the VBOX time to match the PC time. This time will be used for the creation date/time in the VBOX data files.
This area lets you select whether the VBOX will commence logging when moving, will log continuously or follow advanced conditions.

Only when moving
The logging begins when the unit detects a speed of more than 0.5 km/h and stops when the speed is less than 0.5 km/h again.
Continuously
The logging will automatically begin when you insert media in the unit and you can manually control the logging with the LOG button on the Front Panel.
Advanced
This option opens a Custom log condition area where you can set up to 8 logging conditions. Click on the + icon on the right-hand side to add a log condition.
You can use any of the logged data channels to trigger the logging.
Use the Channel dropdown menu to find the channel you wish to use. The Condition and Value fields will let you set a threshold value as either =, < >, <, or > = so that the logging starts or stops when a data value is exceeded (or not). You can combine multiple data channels in a Boolean ‘OR’ manner to control the logging.
Click on the X icon on the right-hand side to remove the log condition.


.VBB files logged to a defined directory will have filenames that correspond to the directory name. The logged data files will follow an incremental suffix convention, for example, ACCEL0000.VBB, ACCEL0001.VBB, etc. Click on the + icon to add a new directory.
You can define an 8-character filename to manage the data capture. Any recorded files will be saved in a directory with the same name. The file names can contain letters, numbers and spaces. Consecutive spaces are not allowed, and you cannot use the following names:
- CON
- PRN
- LPT1
- COM1
Click on the Refresh button to reset the selected directory.
This area will show you an overview of the channels that will be logged with the current configuration.
