This page explains how to mount VBOX Touch units and connect the required components for operation.
Ensure all connections are secure before using the unit.
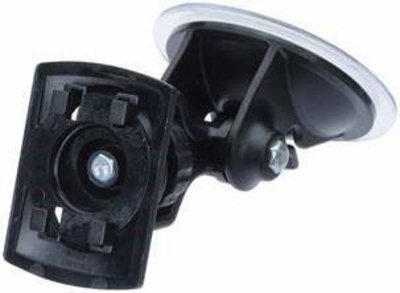
VBOX Touch is supplied with a Swivel Neck Richter Suction Mount (RLACS277) for mounting on a window or windscreen.
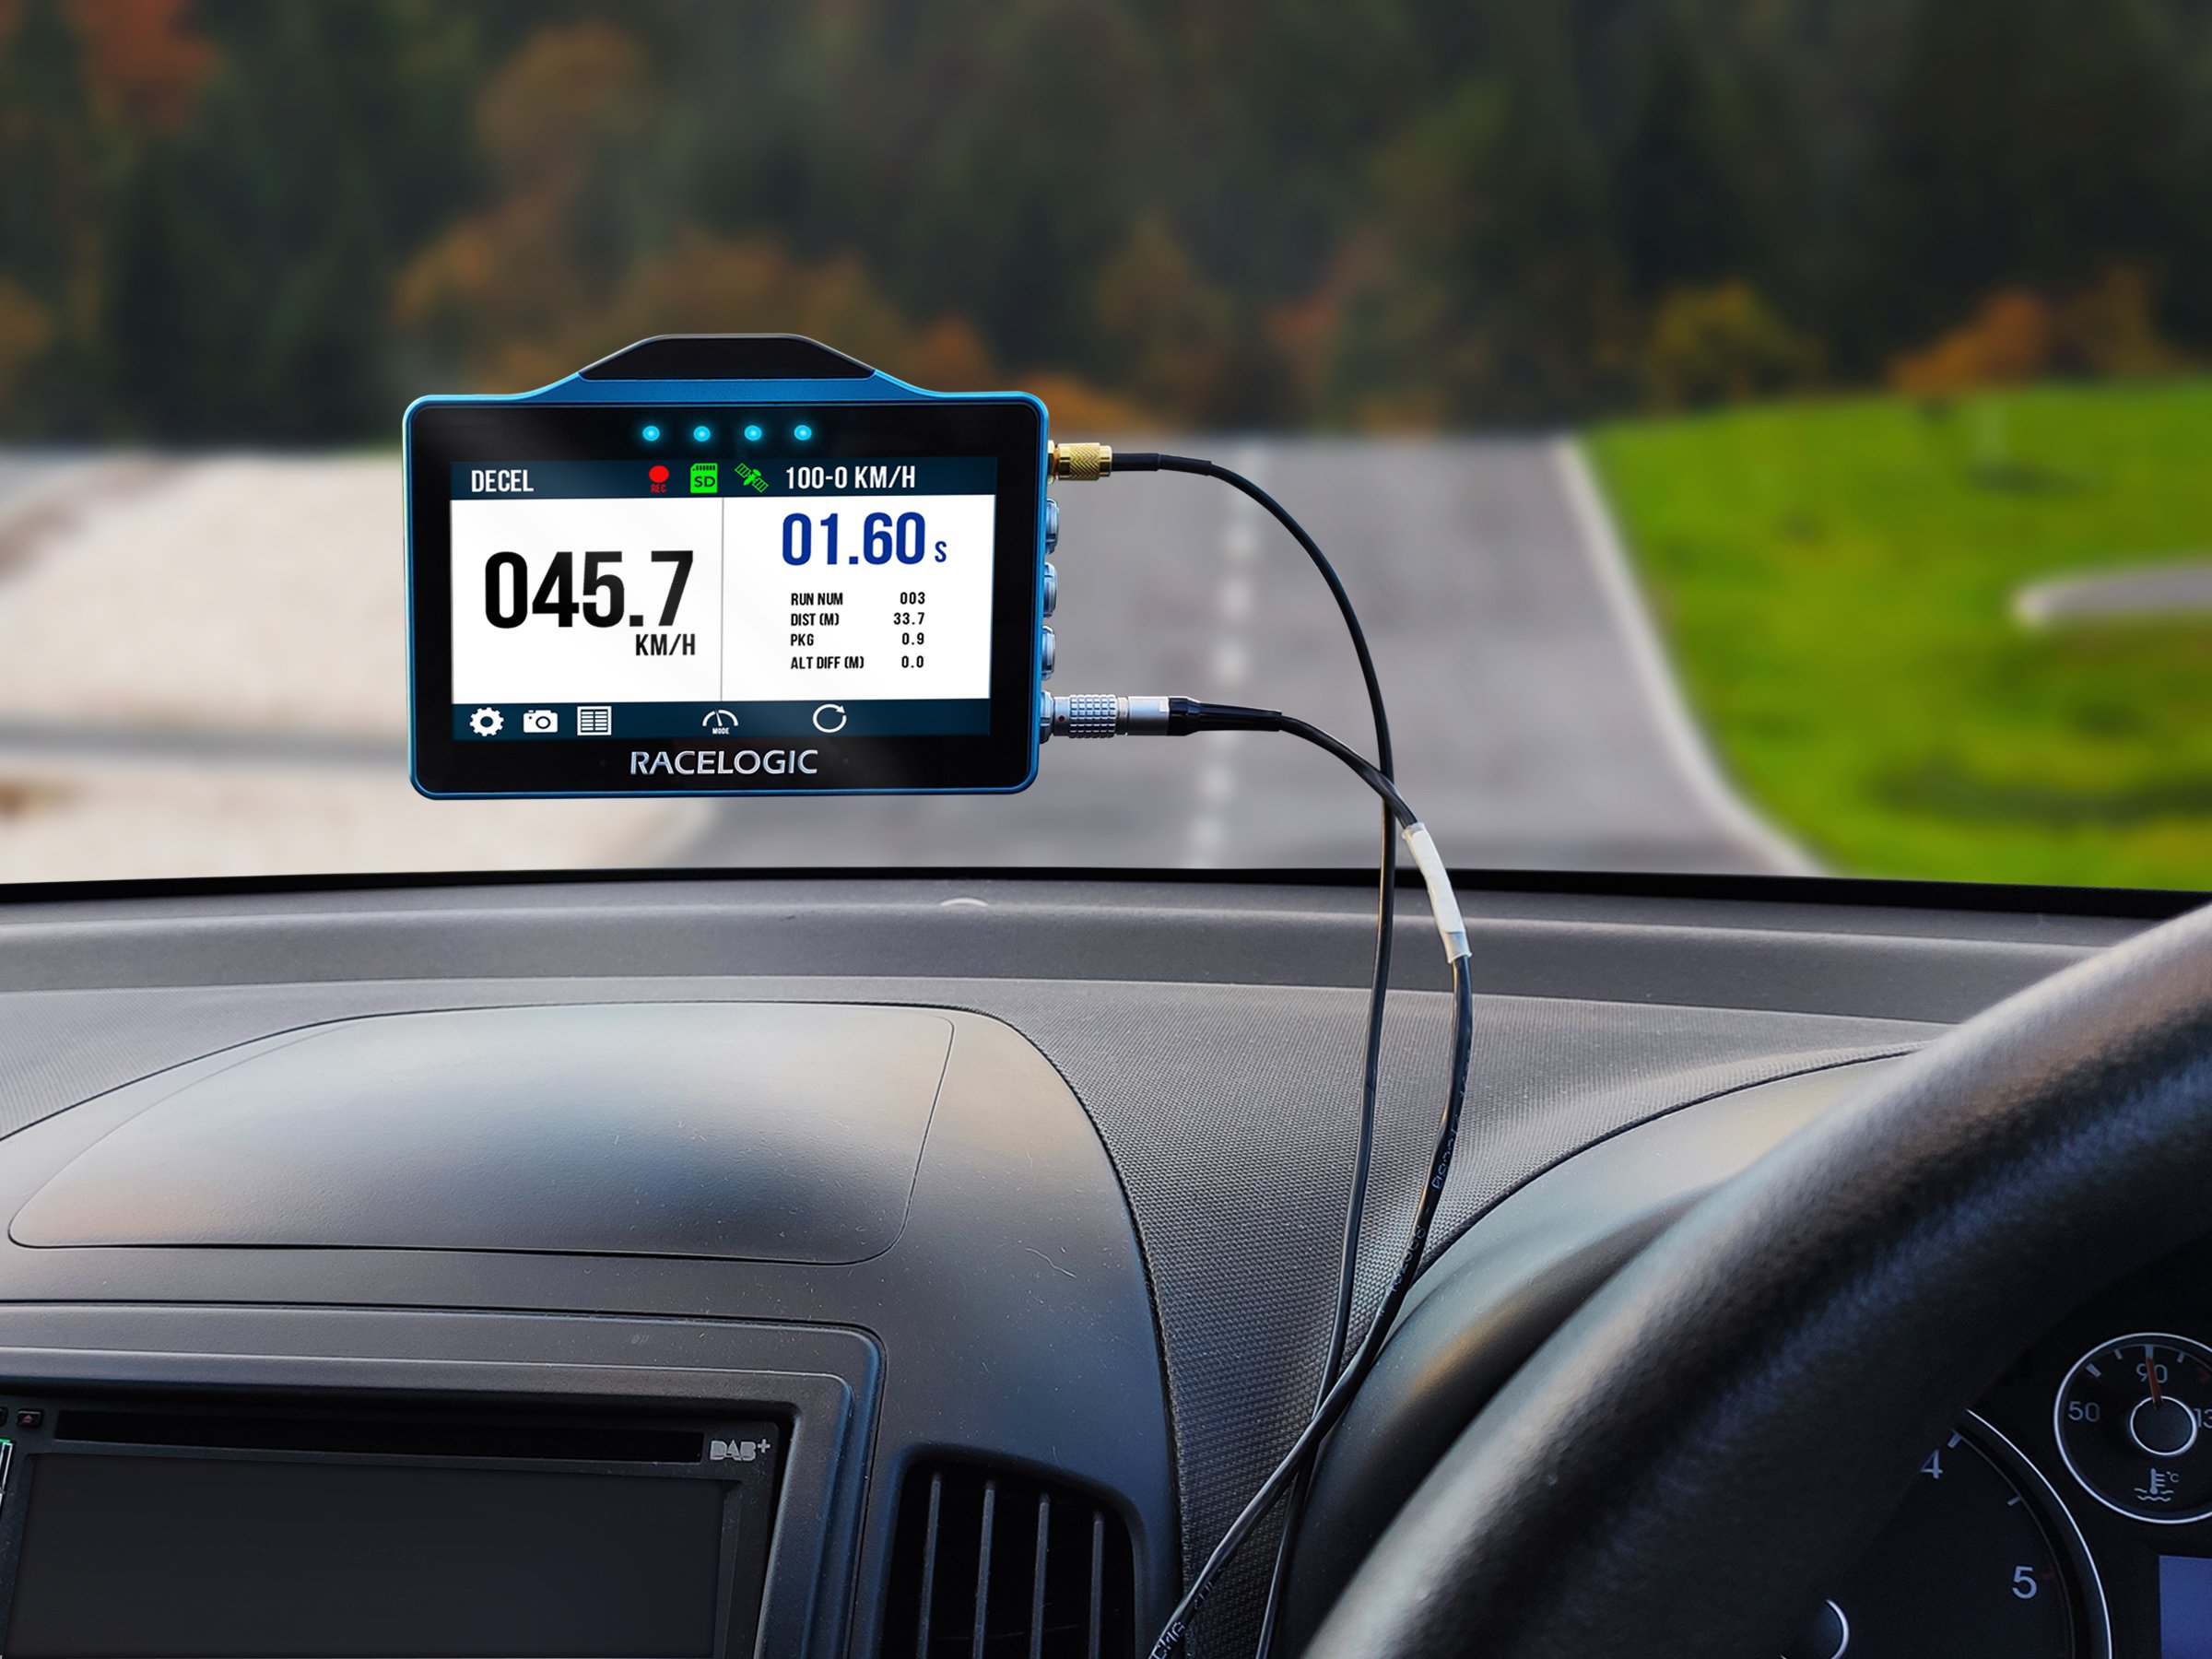
Mount the VBOX Touch securely using the supplied mounting solution.
Position the unit so that:
- the screen is clearly visible
- it does not obstruct the driver’s view
- it remains stable during vehicle movement
Choose a mounting location that allows easy access to the touchscreen while keeping the unit securely in place.

VBOX Touch is supplied with a Swivel Neck Richter Suction Mount (RLACS277) for mounting on a window or windscreen.
Mount the VBOX Touch securely using the supplied mounting solution.
Position the unit so that:
- the screen is clearly visible
- it does not obstruct the driver’s view
- it remains stable during vehicle movement
Choose a mounting location that allows easy access to the touchscreen while keeping the unit securely in place.
NOTE
VBOX Touch also has a ¼ 20 TPI UNC screw thread on the back of the unit for compatibility with alternative mounting solutions.
The unit has an internal antenna, which is likely to be sufficient in open environments. However, for reliable and repeatable results, especially when used inside a vehicle, we recommend using the external antenna.
If you are struggling to maintain a stable satellite lock, you can connect the supplied external antenna (RLACS262) to the antenna port.
Place the GNSS antenna with a clear view of the sky.
For best performance:
- mount the antenna on the vehicle roof where possible
- avoid placing it under metal surfaces or inside enclosed areas
- ensure the antenna is securely positioned to prevent movement during testing
Correct antenna placement is critical for accurate and repeatable results.
Refer to the GNSS Antenna Placement article for more information about best practices for antenna placement.
NOTE
For RTK Corrections (VBOX Touch RTK only) or Brake Trigger Tests, you must use the external antenna.
Connect the VBOX Touch to a suitable vehicle power supply using the supplied cable.
The unit will power on automatically when connected.
Ensure the power connection is secure before use.
Connect the GNSS antenna to the antenna port on the unit.
Ensure the connector is fully secured to maintain a reliable signal.
VBOX Touch can be connected to external systems via CAN or serial interfaces.
Ensure the correct signals and configuration are used before connecting.
Refer to the CAN Bus Settings page for more information about the CAN ports and options on VBOX Touch.
CAUTION
Connect to the vehicle CAN bus at your own risk. Incorrect connection may cause damage to the vehicle or the device.
VARIANT LIMITATION
RTK Corrections are only available on VBOX Touch RTK.
The bottom CAN/Serial port on VBOX Touch RTK can receive RTK corrections via an NTRIP Modem or a Telemetry Radio Module and a Static Base Station (BS6 only).
Refer to the Configuration page for more information about setting VBOX Touch up to receive RTK corrections.
VBOX Touch RTK can receive RTCM correction data from a connected NTRIP Modem.
NOTE
Make sure that the NTRIP Modem is correctly configured before connecting VBOX Touch to it.
Connect the NTRIP Modem to VBOX Touch using an RLCAB170 cable:
- Connect the Hirose connector on the cable to the Hirose connector on the bottom of the NTRIP Modem.
- Connect the Lemo connector on the cable to the bottom CAN/Serial port on VBOX Touch.

NOTE
When VBOX Touch RTK is receiving RTK corrections, you must use the external antenna.
VBOX Telemetry Radio
VBOX Touch RTK can receive RTCM correction data from a telemetry radio modem acting as the receiver for data transmitted from a Racelogic DGNSS Base Station.
Connect the telemetry radio to the bottom CAN/Serial port on VBOX Touch using an RLCAB005 cable.

Satel Radio
Alternatively, you can also use SATEL radios for long-range applications on large test sites.
NOTE
Make sure that the Base Station is correctly configured before connecting to VBOX Touch.
Connect to VBOX Touch as described for the VBOX Radio Modem, but note that you must use an RLCAB096L cable in place of the RLCAB005 cable.
RLCAB096L has a 15-way D-Sub connector that connects to the SATEL radio modem.
Insert the SD card into the SD card slot before use.
All logged data is stored on the SD card.
- Do not attempt to configure or navigate menus while driving.
- Only perform brief, single interactions with the touchscreen when it is safe to do so (for example, marking an event or capturing a screenshot).
- Always prioritise safe vehicle operation.
- Ensure the unit is securely mounted and does not obstruct the driver’s view.
- Route all cables so they do not interfere with vehicle controls.