The GNSS monitor is a L1-only display and can display GPS L1, GLONASS G1, BeiDou B1 and Galileo E1. The user can enable and disable constellations from being displayed on the signal histogram to suit their needs.
The signal strengths shown on the Signal Histogram are for the internal GNSS monitor in LabSat 4, user equipment connected to the output may display different results depending upon the equipment and configuration used.
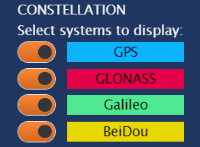
This is where you select the constellations you want to display on the Signal Histogram.
- GPS
- GLONASS
- Galileo
- BeiDou
This is where you select the constellations you want to display on the Signal Histogram.
- GPS
- GLONASS
- Galileo
- BeiDou

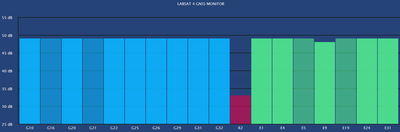
The bars on the histogram represent each individual satellite.
These bars will display the SV number and SNR for each satellite captured in the scenario.
The more transparent bars represent the satellites that are being tracked but not used in the current position calculation.

The bars on the histogram represent each individual satellite.
These bars will display the SV number and SNR for each satellite captured in the scenario.
The more transparent bars represent the satellites that are being tracked but not used in the current position calculation.
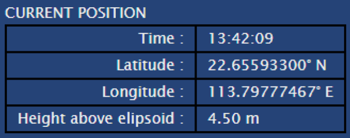
This section will display the current GPS time, latitude, longitude and height above the ellipsoid throughout the playback of the scenario.
This section will display the current GPS time, latitude, longitude and height above the ellipsoid throughout the playback of the scenario.

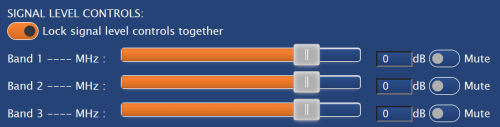
The Signal Level Controls have an attenuation control for each band in the current scenario replay.
You can either adjust the level for each band individually or lock the signal level controls together. When locked together, the sliders will move the same amount regardless of the start position.
You can adjust the attenuation with the slider or by clicking on the required location on the bar. You can also enter the level into the boxes directly. Press the tab key or click away to apply the setting.
You can select an attenuation level between 0 to - 69 or an amplification level between 0 to + 20.
You can mute/unmute bands by clicking on the toggle switch on the right-hand side of each band.

Note: Attenuation is not available during recordings.