- If you are using an SSD, and it is correctly mounted and recognised, LabSat 4 will display the File Selection Screen when it is powered up.
- If you are not using an SSD or it is not recognised, LabSat 4 will display the Directory Selection Screen when it is powered up.

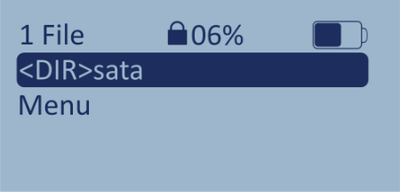
This is where you can find a list of all the available directories.
Each directory will have the prefix <DIR>.
You can also access the Menu from the Directory Selection Screen.
Note: The Directory Selection Screen is also where you will find the NAS directory if you are using one.
This is where you can find a list of all the available directories.
Each directory will have the prefix <DIR>.
You can also access the Menu from the Directory Selection Screen.
Note: The Directory Selection Screen is also where you will find the NAS directory if you are using one.

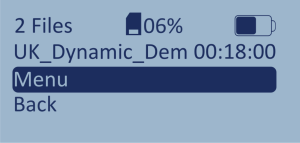
The File Selection Screen is the default screen when you power-up LabSat 4. It displays the folders and recorded scenario files that are saved on the root of the SSD. Navigate to subdirectories by selecting a directory on the root and press OK to enter it.
The file selection screen will display up to 256 files per directory. You can use the Up and Down arrows to cycle through the files and available options.
It also gives you access to the Menu and the option to go Back to the Directory Selection Screen if you need to change the directory.
When you start recording or replaying a scenario, LabSat 4 will display the Record or the Replay Screen.
The Record Screen will display the number of satellites, the allocated file name, the recording duration, and the CAN and RS232 logs being recorded (if enabled). The flashing square next to a signal type indicates that the signal is being recorded. When a recording is complete, the File Selection Screen will open with the recorded file in the list of available files.
Model Limitations
This screen is present on LabSat 4 (RP) variants only.

The Replay Screen will display the number of satellites, the file name, the replay duration, the progress through the length of the recording file and any applied signal attenuation. When the replay has finished, the File Selection Screen will open.

The Replay Screen will display the number of satellites, the file name, the replay duration, the progress through the length of the recording file and any applied signal attenuation. When the replay has finished, the File Selection Screen will open.
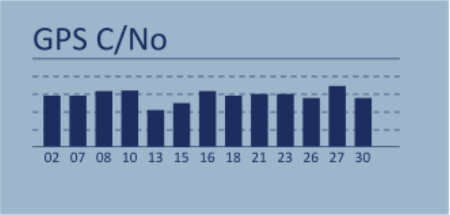
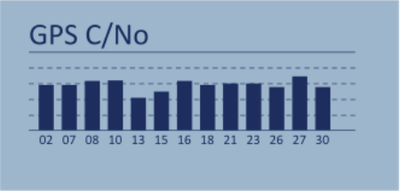
From the Record/Replay Screen, you can press the OK button to display the GNSS Monitor in the form of a live constellation histogram. It will display the current satellite levels detected by the internal receiver. You can use the Up and Down buttons to cycle through the histograms for the different constellations.
Note:
- The internal receiver currently supports GPS, GLONASS, BeiDou and Galileo constellations.
- When you switch to a different constellation, the internal receiver will need some time to re-acquire the satellite signal levels.
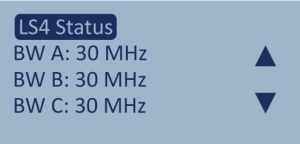
Press the OK button while on the GNSS Monitor Histogram to open the LS4 Status screen.
When Recording: This option will display the recording settings currently configured on the unit.
Use the arrow buttons to navigate through the following data:
- The set bandwidth for Channels A, B and C
- The set quantization for Channels A, B and C
- The set frequency for Channels A, B and C
- The settings for the 4 digital channels (if enabled)
- Manual Gain levels (if enabled)
- CAN log file status (if enabled)
- RS232 log file status (if enabled)
When Replaying: This option will display the recording settings from the file that is being replayed.
Use the arrow buttons to navigate through the following data:
- The set bandwidth for Channels A, B and C
- The set quantization for Channels A, B and C
- The set frequency for Channels A, B and C
- The settings for the 4 digital channels (if enabled)
- CAN log file status (if enabled)
- RS232 log file status (if enabled)
Press the OK button to return to the Record/Replay Screen.
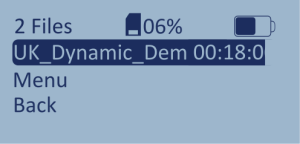
There are 2 ways to enter the Main Menu on your LabSat 4. You can either:
Highlight a file and press the OK button.
- When you highlight a file and press the OK button, you will be taken to the Main Menu. You will get file-specific options and information in the File Menu.


OR
Navigate to the Menu option on the File Selection Screen and press the OK button to select it.
- When you enter the Main Menu by selecting the Menu option, you will not see file-specific options and information in the File Menu.