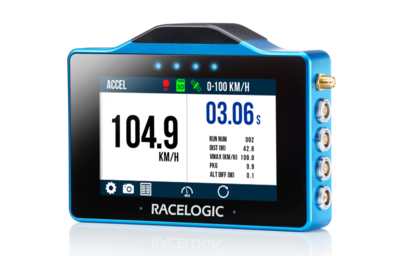
VBOX Touch and VBOX Touch RTK are GNSS-based data loggers with touchscreen interfaces designed for measuring speed, position, and vehicle performance.
They support multiple test modes, including:
- Speed
- Acceleration
- Deceleration
- Lap Timing
All modes use the same core setup and logging behaviour.
This quick start guide explains how to set up the unit, begin logging data, and use the available test modes.
RTK Operation (Optional - VBOX Touch RTK Only)
RTK variants support enhanced positional accuracy using correction data.
Additional setup is required to enable RTK functionality.
Find more information in the VBOX Touch User Guide.
Register your unit to receive firmware updates, software releases, and technical support.
Typical kit includes:
- VBOX Touch or VBOX Touch RTK unit
- Power cable (vehicle supply)
- SD card
- GNSS antenna
- Mounting solution
- Protective rubber cover
- Carry case
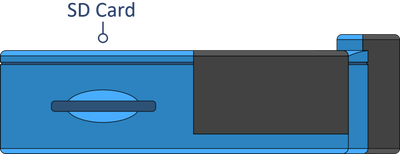
Side views of VBOX Touch with connectors and SD Card slot:


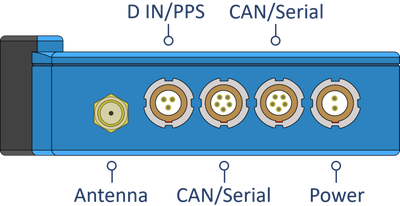
Connect to vehicle power (12 V supply)
The unit will automatically power on when connected to power.
On startup, the unit will:
- Search for satellites
- Detect the SD card
- Display the mode selection screen (on first use)
Insert the SD card into the side of the unit.
All data is recorded directly to the SD card.
Use FAT32-formatted SD cards only. For reliable performance, use a Class 10 card or higher.
While the internal antenna may be sufficient in open environments, the external antenna improves signal reliability.
Connect the GNSS antenna to the Antenna port on VBOX Touch.
Place it on the vehicle with a clear view of the sky.
Avoid placing the antenna under metal surfaces, as this can reduce signal quality.
You can find more information about best practices in the GNSS Antenna Placement article.
Mount the unit securely using the supplied mount.
Ensure the screen is clearly visible during use.
The unit records data to the SD card when logging.
By default, logging starts automatically when the unit detects movement. This behaviour can be changed in the settings.
Tap the SD card icon on the display to manually start and stop the logging on VBOX Touch.
Manual logging will override automatic logging.
- Green SD icon → ready
- Logging Status icon visible → logging active
You can find more information about the additional status indicators in the VBOX Touch User Guide.
IMPORTANT
Do not remove the SD card when the Logging Status Icon is displayed on the VBOX Touch screen.
VBOX Touch will display this icon when it is actively recording to the media, and removing the media during this process can cause data to be lost or corrupted.
Always check the screen to confirm that the unit is not logging before you eject the SD card.
If the SD card has been removed while the unit was recording to it, you may need to repair the card before it can be used again.
The unit will automatically search for satellites on startup.
For best performance:
- Ensure a clear view of the sky
- Avoid mounting near metal obstructions
- Use the external antenna if signal is unstable
If VBOX Touch cannot achieve satellite lock, you may need to do a coldstart.
Tap the COLDSTART button in the Diagnostics Settings and wait for the unit to search for and detect satellites.

Select a display mode on first startup, or change it using the touchscreen.
The last used mode will open automatically on power-up.
Use the touchscreen to navigate between views and to access settings.
Swipe left or right to move between screens when available. Use on-screen controls to change values or open settings where available.
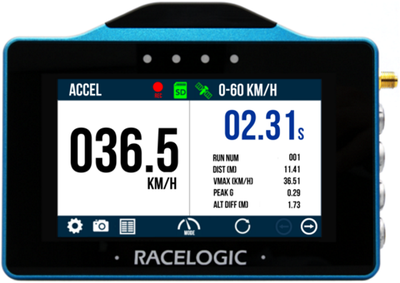
Overview
- Acceleration tests, including 0–60, 0–100, 0–100–0 and 0–¼ mile.
- Configure custom speed, distance or 0-speed-0 tests.
- Other options include enabling or disabling alert at end of test, one-foot rollout and slope correction.
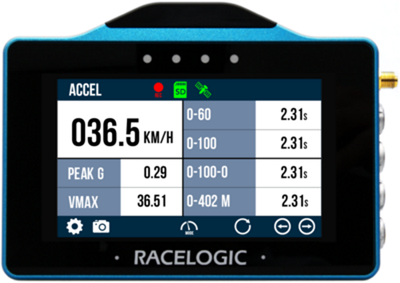
- Display up to 4 concurrent test results.
- The screen displays time, run number, distance, VMAX, Peak G and altitude difference. You can easily change the units of measurement for speed and distance (metric or imperial).
Behaviour
- Configure multiple acceleration tests.
- The unit will automatically start tests once the unit detects movement (can be changed in the settings).
- The results are displayed live on the screen.
Configuration
When selecting Accel Mode, you must configure the required acceleration tests.
Typical configuration includes:
- Selecting start and end speeds (e.g. 0–60, 0–100)
- Choosing speed units (mph or km/h)
Default Accel Test configuration:
- Select Accel mode.
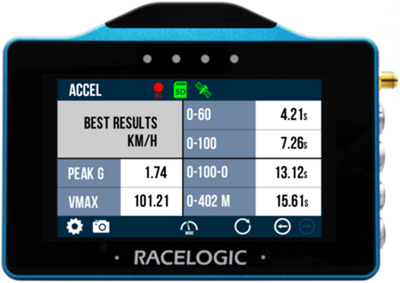
- Choose the Accel Screen you want to view during the test: Primary, Secondary or Best Results.


- Tap Settings → Accel.
- Set the Start and End parameters for the accel tests.
- Tap Exit to return to the Accel Mode Display.
- When the unit has gained satellite lock, it is ready to display live Accel Test results.
- By default, VBOX Touch will automatically start recording when travelling over 0.5 km/h
- When you have finished your testing, you can view the completed test result by tapping the Results button.
See the full VBOX Touch User Guide for detailed information about available settings and more complex configurations.
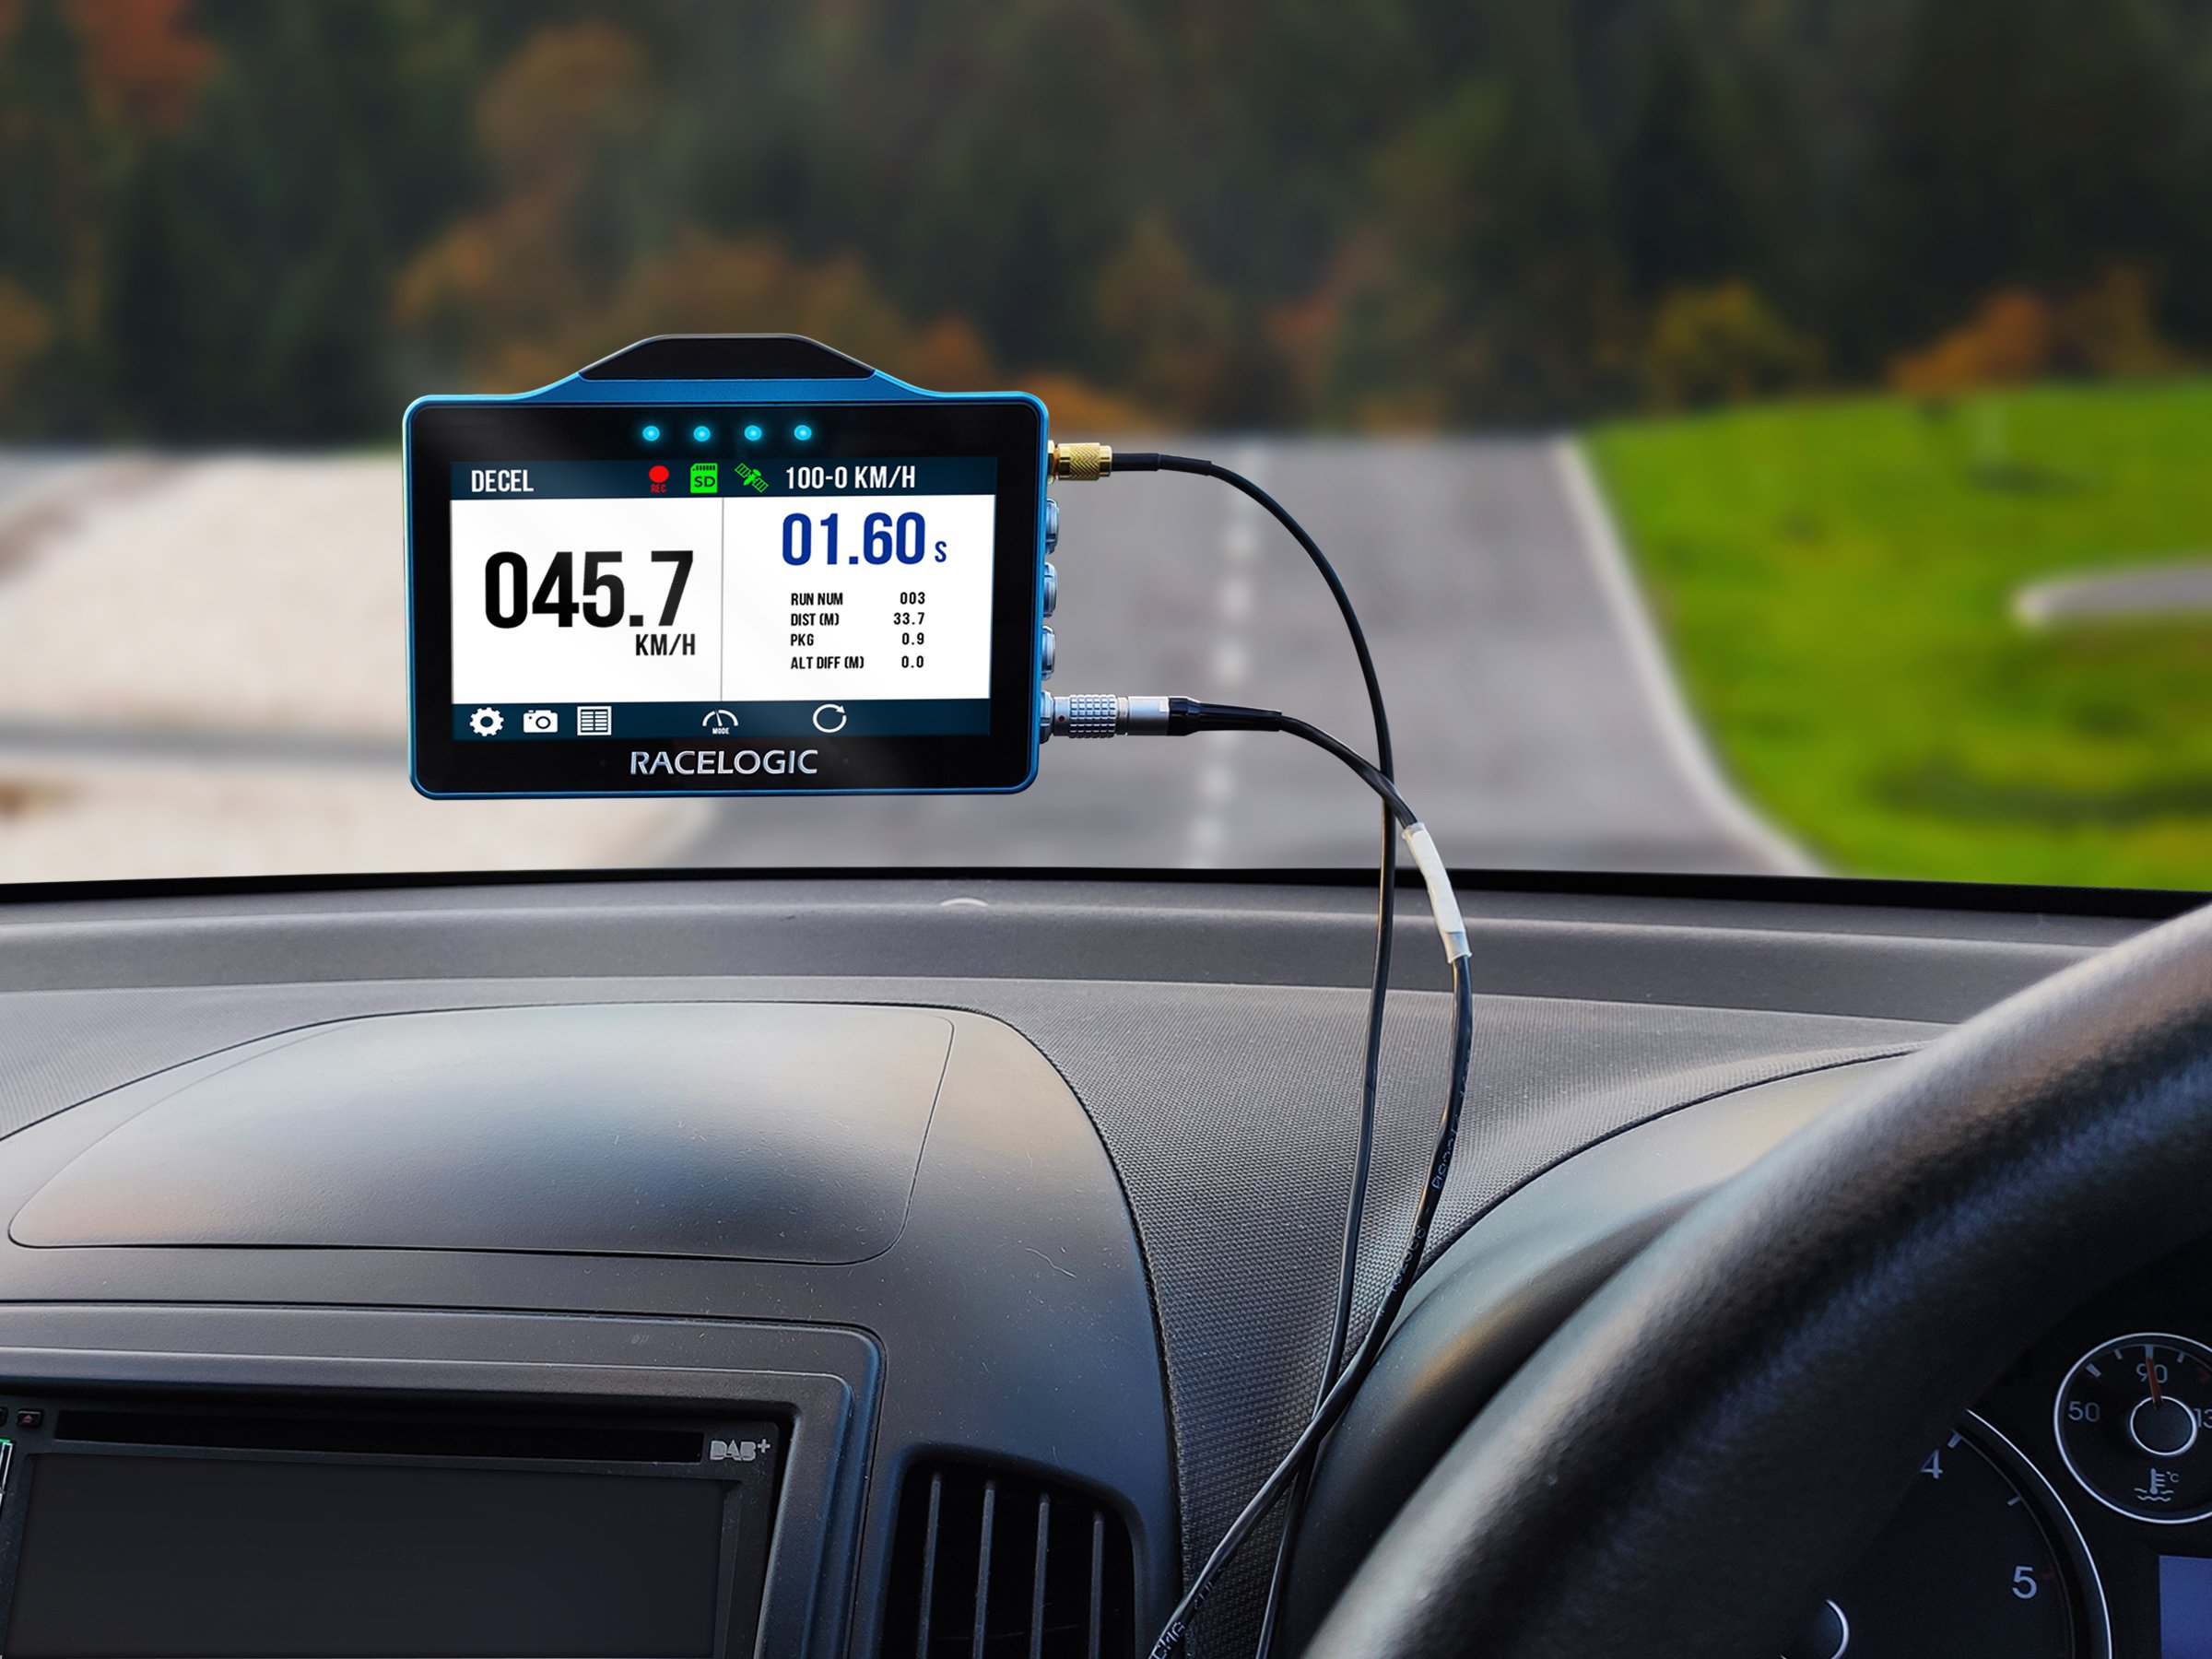
Overview
Deceleration Mode is used to measure braking performance.
- Deceleration tests, including 0–60, 0–100, 200–0, 300–0 km/h or mph.
- Custom test so you can define your own configurable settings.
- The screen displays time, run number, distance, Peak G and altitude difference. You can easily change the units of measurement for speed and distance (metric or imperial).

Behaviour
- Braking events are detected automatically
- Stopping distance and deceleration rates are calculated
Configuration
When selecting Decel Mode, you must select and/or configure the required tests. Make sure that the correct test ranges are selected before you perform braking tests.
Typical configuration includes:
- Selecting start and end speeds
- Choosing speed units (mph or km/h)
Default Decel Test configuration:
- Select Decel mode.
- Tap Settings → Decel.
- Select Test Type: Decel.
- Select one of the preset tests.
- Tap the Exit button to return to the Decel Display.
- When the unit has gained satellite lock, it is ready to display live Decel Test results.
- By default, VBOX Touch will automatically start recording when travelling over 0.5 km/h.
- When you have finished your testing, you can view the completed test result by tapping the Results button.
See the full VBOX Touch User Guide for detailed information about available settings and more complex configurations, such as Trigger tests.
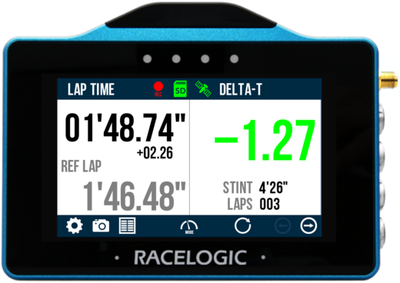
Overview
Lap Timing Mode is used for track testing and lap timing.
- VBOX Touch can function as a sophisticated lap timer with an updateable built-in database of over 800 circuits, real-time Delta-time, Delta-speed (shown via LEDs), Best Lap Time, Current Lap Time, Total Session Time and Lap Count.
- By using virtual start/finish lines and GPS, there is no need for an external beacon or transmitter, as the timing will start when the unit detects vehicle movement. You can set separate start and finish lines for sprint or hill climbing.
Behaviour
- Laps are detected using GPS position
- Lap times and performance data are displayed on screen
Configuration
When selecting Lap Timing Mode, you must configure the Track Settings.
Typical configuration includes:
- Setting a start/finish line at your current position
- Loading a previously saved track (if available)
Ensure the correct start/finish line is set before beginning a session.
Default Lap Timing configuration:
- Select Lap Timing mode.
- Tap Settings → Lap Timing.
- Make sure that the selected Track is correct.
- Tap the Exit button to return to the Lap Timing Display.
- When the unit has gained satellite lock, it is ready to display live Lap Timing data.
- Select the Lap Timing display screen you want to use: Main or Basic.


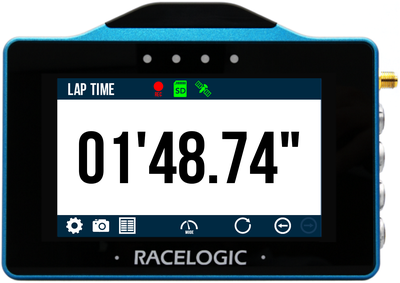
- The unit is now ready to display live Lap Timing values.
- By default, VBOX Touch will automatically start recording when travelling over 0.5 km/h.
- When you have finished, you can view the lap result by tapping the Results button.
See the full VBOX Touch User Guide for detailed information about available settings and more complex configurations, such as setting new start and finish lines.
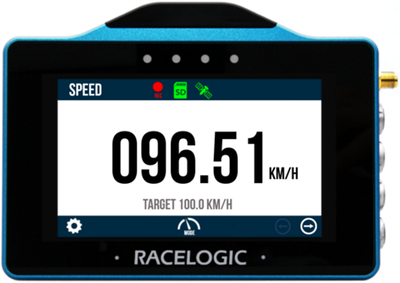
Overview
Speed Mode displays real-time speed data along with key summary metrics.
It is the simplest mode and requires minimal setup to begin measuring speed.
- Works as a highly accurate digital speedometer, a handy feature for street driving.
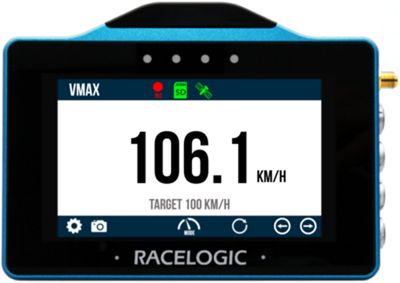
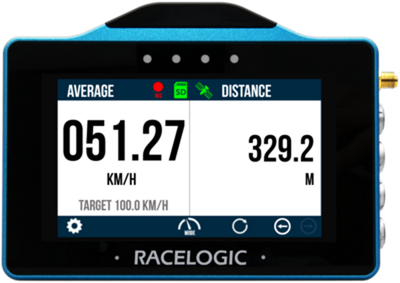
- Set the units to kph or mph and the display can show live speed, VMAX, average speed and distance as well as a target speed.
Behaviour
- Speed is displayed in real time once satellite lock is achieved.
- VMAX updates automatically when a higher speed is reached.
- Average speed is calculated continuously during movement.
Configuration
Speed Mode does not require configuration to begin measuring speed.
Before starting a new test:
- Reset VMAX to clear previous results
- Reset average speed if required
You can change the Units (mph or km/h) in the settings menu if needed.
Default Speed Display:
- Select Speed mode.
- Select the Speed Display screen you want to use, Primary Speed Screen, Vmax Screen or Average Speed Screen:


- When the unit has gained satellite lock, it is ready to display live Lap Timing data.
- The unit is now ready to display live speed values.
- By default, VBOX Touch will automatically start recording when travelling over 0.5 km/h.
See the full VBOX Touch User Guide for detailed information about available settings and more complex configurations, such as setting a target speed.
Before removing the SD card:
- Make sure that VBOX Touch has stopped logging.
- Confirm that the Logging Status icon is no longer displayed.
Once set up, the unit will:
- Display live performance data.
- Record all data to the SD card.
- Allow you to switch between test modes without reconfiguration.
A recorded session will be saved on the SD card as a .vbo file. This can be analysed later by using our data analysis software VBOX Test Suite.
- Check that the unit has a satellite lock.
- Make sure that the antenna has a clear view of the sky.
- Check that the SD card is inserted correctly.
- Confirm that logging is active.
- Wait for a stable satellite signal before testing.
- Check the antenna placement.