This page is the Quick Start Guide for VBOX LapTimers with Side Connectors (RLVBLAP-S ) and VBOX LapTimers with Rear Connectors (RLVBLAP-R).
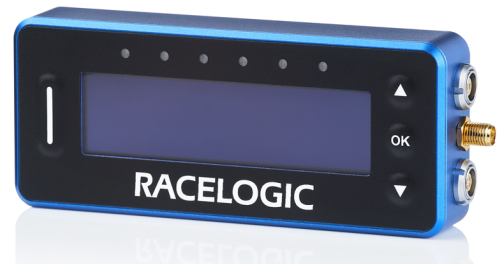
VBOX LapTimers (RLVBLAP-R or RLVBLAP-S) consist of a 25 Hz GNSS data logger and predictive lap timer display all in one unit, with the connectors mounted either on the side or on the rear panel.
VBOX LapTimers with Rear Connectors (RLVBLAP-R) are intended for more permanent installations with the connectors located on the rear of the display and a supplied rear mount bracket attachment using 4 x M3 screws.

You can find the full User Guide alongside Technical Properties and Firmware information in the VBOX LapTimer (RLVBLAP-R and RLVBLAP-S) Product Category on Racelogic's Support Centre.
Please register your VBOX unit so that we can provide you with notifications about the latest software releases and firmware upgrades for it and offer technical support.
Register your device here.
When you purchase a VBOX LapTimer with Side Connectors, you will find the following items when you open the box:
| Product Code | Quantity | Description |
|---|---|---|
| VBLAP02-S-V1 | 1 | VBOX LapTimer Unit with connectors on the side |
| RLACS262 | 1 | GNSS Antenna |
| RLCAB14LE | 1 | Unterminated Power Cable |
| RLACS313 | 1 | 8 GB SD Card |
| RLACS287 | 1 | Lightweight Windscreen Suction Mount |
When you purchase a VBOX LapTimer with Rear Connectors, you will find the following items when you open the box:
| Product Code | Quantity | Description |
|---|---|---|
| VBLAP02-R-V1 | 1 | VBOX LapTimer Unit with connectors on the rear |
| RLACS262 | 1 | GNSS Antenna |
| RLCAB14LE | 1 | Unterminated Power Cable |
| RLACS313 | 1 | 8 GB SD Card |
| RLACS359 | 1 | Rear Connector Bracket Assembly |
Depending on the application requirements, you may need to purchase additional accessories for your LapTimer.
| Product Code | Description |
|---|---|
| RLCAB010LE | In-Car Power Supply |
| RLACS286 | Roll Cage Camera Mount with Thumb Nut for RLVBLAP-S |
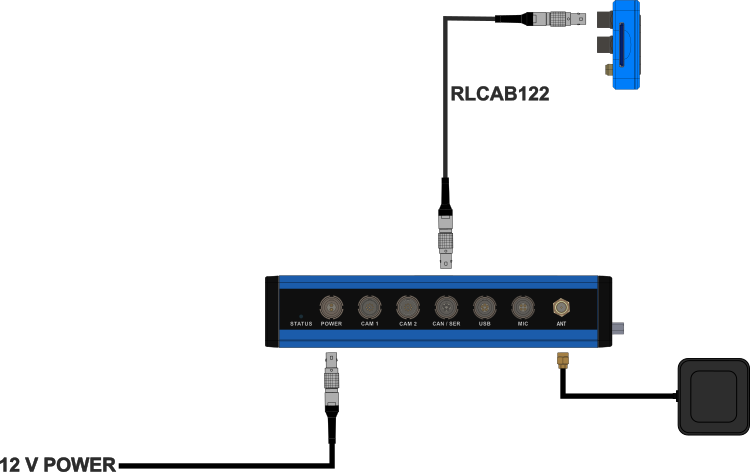
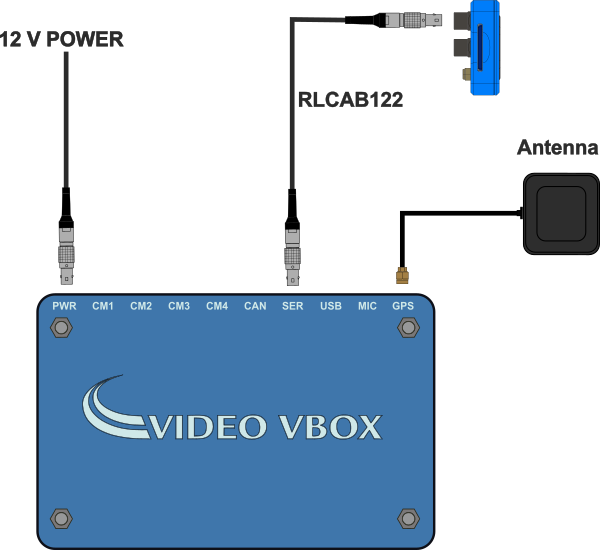
| RLCAB122 | VBOX LapTimer Connection Cablefor connecting VBOX LapTimer to a Video VBOX Pro or VBOX Video HD2 |
Any suitable 12 V supply powers the LapTimer. You must wire the unterminated end of the RLCAB014LE cable directly to a compatible power supply or to a connector that you can use with a compatible power supply.
The power port is the top Lemo port on the unit.
When you power up the LapTimer unit, the LEDs will light white and sweep through the LED array to indicate that the unit is powered and initialising.
On the VBOX Laptimer with Side Connectors, the connectors are located on the right-hand side of the unit in the following order from top to bottom:
- Connector 1 - POWER (2-pin Lemo)
- Connector 2 - GPS Antenna (SMA)
- Connector 3 - RS232/CAN (5-pin Lemo)
You can find the full pinout information in the Technical Properties.
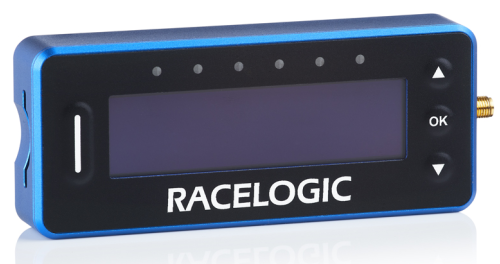
The SD Card slot is located on the left-hand side of the unit.
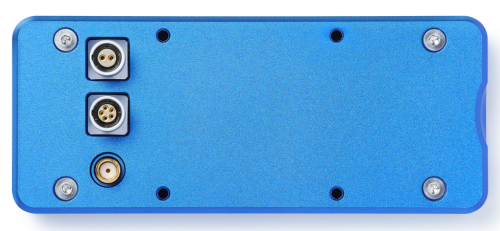
On the VBOX Laptimer with Rear Connectors, the connectors are located on the right-hand side of the unit in the following order from top to bottom:
- Connector 1 - POWER (2-pin Lemo)
- Connector 2 - RS232/CAN (5-pin Lemo)
- Connector 3 - GPS Antenna (SMA)
You can find the full pinout information in the Technical Properties.

The SD Card slot is located on the left-hand side of the unit.

You mostly use the OK button to configure the settings in the Menu.
However, it will also have some functionalities depending on the mode that is currently active on the screen.
See the list below for the full list of functionalities for the different display modes.

You mostly use the OK button to configure the settings in the Menu.
However, it will also have some functionalities depending on the mode that is currently active on the screen.
See the list below for the full list of functionalities for the different display modes.
| Mode | Function |
|---|---|
| Speed | Start and stop logging |
| Max Speed | Reset max speed value |
| Predictive Lap Timing | Single press fixes the current or stored lap as the reference lap, depending on the chosen settings. |
| Predictive Lap Timing | Press and hold for 5 seconds to clear the stored reference lap, reset the lap count and clear all stored lap times. |
| Lap Timing | Set a new start/finish line |
| Lap Count | No action |
| Lateral G | Reset max g reached |
| Longitudinal G | Reset max g reached |

Pressing this button in any display mode (except Speed Mode) will make the unit display the Speed Mode for 10 seconds before returning to the original display mode.
It will also act as a shortcut to exit the settings and go back to the display modes.

Pressing this button in any display mode (except Speed Mode) will make the unit display the Speed Mode for 10 seconds before returning to the original display mode.
It will also act as a shortcut to exit the settings and go back to the display modes.
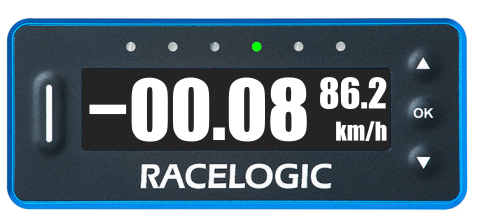
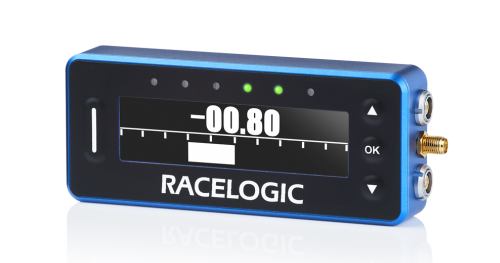
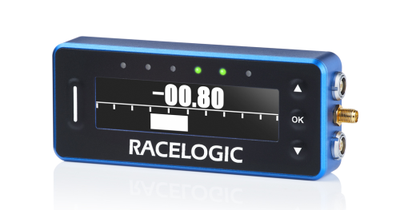
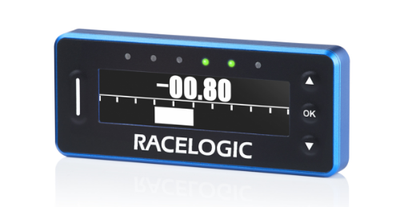
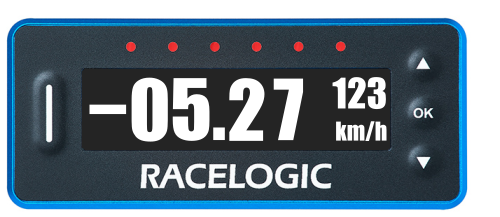
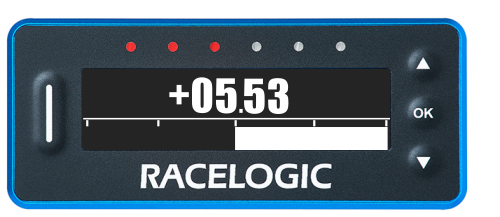
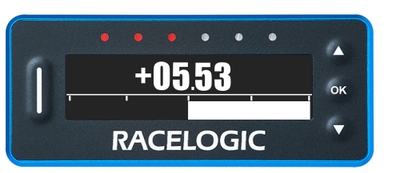
The LEDs on the front of the VBOX LapTimer indicate the Delta-V of your vehicle.
Red LEDs indicate that the speed is slower than the reference point and green LEDs indicate that the speed is faster than the reference point. When the LEDs are off, they indicate that you are matching the reference lap speed.
Note: Each of the LEDs on the unit represents 33% of the selected Delta-V range. 0 delta time is in the centre of the unit's LED array.
When the LapTimer calculates that your current speed is slower than the reference lap, the 3 LEDs on the left will gradually light up red from the centre and out, 1 LED per 33% of the Delta-V Range set in the Predictive Lap Timing settings.
When the LapTimer calculates that your current speed is faster than the reference lap, the 3 LEDs on the right will gradually light up green from the centre and out, 1 LED per 33% of the Delta-V Range set in the Predictive Lap Timing settings.
While the screen still displays the Delta-T for each lap, you have an optional mode that takes over the function of the LEDs when you are using predictive lap timing.
If the Combo G is greater than a selected minimum threshold (50 % LED minimum %, 0.5 g default), the LEDs will light up various colours dependent on the maximum g threshold selected (1.0 g default).
- The LEDs will show red where the Combo G has reached the LED minimum % selected (50% by default).
- Above this minimum value, the LEDs will show a colour gradient between red and green, giving a changing yellow/orange colour, dependent on the live Combo G value.
- The LEDs will show green where the Combo G is equal to or greater than the selected maximum g threshold.
You can change the settings for the Combo-G LED behaviour in the Predictive Lap Timing Menu.
Appropriate placement of the GNSS antenna is crucial to the quality of the data that is being recorded.
You can find information about how to mount the antenna here.

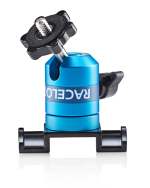
Standard Accessory - RLACS287
The RLACS287 Lightweight Windscreen Suction Mount is the mount that is delivered with the LapTimer as standard.
Standard Accessory - RLACS287
The RLACS287 Lightweight Windscreen Suction Mount is the mount that is delivered with the LapTimer as standard.

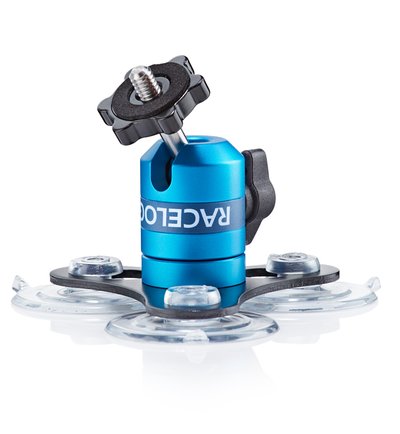
Optional Mounting - RLACS286
The RLACS286 Roll Cage Camera Mount with Thumb Nut is an alternative mount for the RLVBLAP-S LapTimers.
You can purchase this on the VBOX Motorsport Online Store.
Optional Mounting - RLACS286
The RLACS286 Roll Cage Camera Mount with Thumb Nut is an alternative mount for the RLVBLAP-S LapTimers.
You can purchase this on the VBOX Motorsport Online Store.

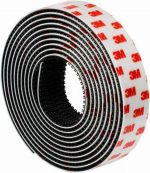
Optional Mounting - 3M Dual Lock
You can purchase and use Dual Lock tape to attach the LapTimer to a dashboard.
Not sold by Racelogic
Optional Mounting - 3M Dual Lock
You can purchase and use Dual Lock tape to attach the LapTimer to a dashboard.
Not sold by Racelogic
Image missing
Image missing
Image missing

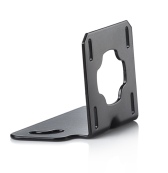
Standard Accessory - RLACS359
The RLACS359 Rear Connector Bracket Assembly is the mount that is delivered with the LapTimer as standard.
Standard Accessory - RLACS359
The RLACS359 Rear Connector Bracket Assembly is the mount that is delivered with the LapTimer as standard.
Optional Mounting - 3M Dual Lock
You can purchase and use Dual Lock tape to attach the LapTimer to a dashboard.
Not sold by Racelogic
Optional Mounting - 3M Dual Lock
You can purchase and use Dual Lock tape to attach the LapTimer to a dashboard.
Not sold by Racelogic

If the LapTimer unit is logging, you will see a scrolling bar across the bottom of the screen (except in Predictive Lap Timing mode).
You can start and stop the data logging by pressing the OK button in the Speed Display mode.
If the LapTimer unit is logging, you will see a scrolling bar across the bottom of the screen (except in Predictive Lap Timing mode).
You can start and stop the data logging by pressing the OK button in the Speed Display mode.
The LapTimers have several different display modes that you can cycle through with the up and down buttons on your unit.
You can change the available display modes in the Display Modes Menu.
The following Display Modes are enabled by default:
All lap times and split times are interpolated to 0.01-second resolution.
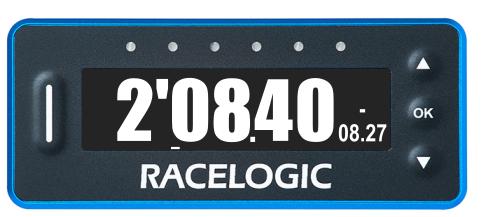
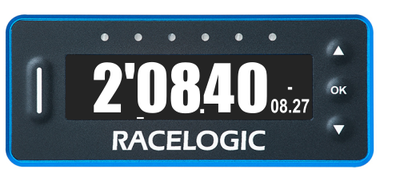
Live Rolling or Static Lap Time
In this mode, the screen can display either a live rolling lap time or a static last lap time and the lap count. You can change this in the Lap Timing Menu.

All lap times and split times are interpolated to 0.01-second resolution.
Live Rolling or Static Lap Time
In this mode, the screen can display either a live rolling lap time or a static last lap time and the lap count. You can change this in the Lap Timing Menu.

Fastest Lap
The difference between the new lap time and the best lap time will be shown with a + or – sign. A ‘–’ is shown when a faster than best is achieved and a ‘+’ is shown for a slower than best.
Fastest Lap
The difference between the new lap time and the best lap time will be shown with a + or – sign. A ‘–’ is shown when a faster than best is achieved and a ‘+’ is shown for a slower than best.
Before using this mode, you need to set a start/finish line. Make sure that you have selected a track layout through the main menu or set a start line manually.
Before you cross the start/finish line, the screen will show Waiting for start line and the distance from your current location to it.
When you first cross the line and during the first lap, LapTimer will create a reference lap.
The second time you cross the start line, the LapTimer starts predicting.
If you set a new start/finish line while the LapTimer is logging, the Predictive Lap Timing mode will start recording a new reference lap.
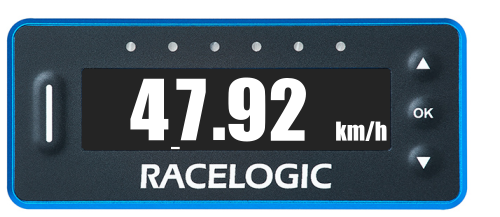
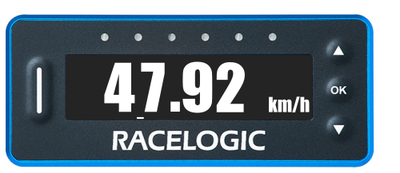
In Speed mode, the screen will display a large clear speed value with up to 2 decimal places. You can set the speed to display in kph, mph or knots. You can adjust the number of decimal places displayed. For more information on how to change these settings, see here.
In Speed mode, the screen will display a large clear speed value with up to 2 decimal places. You can set the speed to display in kph, mph or knots. You can adjust the number of decimal places displayed. For more information on how to change these settings, see here.
You can find more information about these and the rest of the full range of different display modes in the User Guide.
The VBOX LapTimers have an on-screen menu that contains the available unit settings.
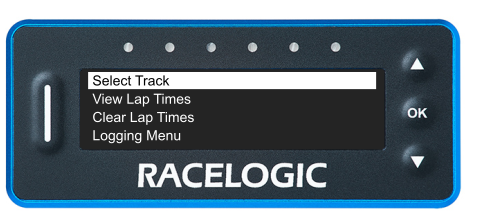
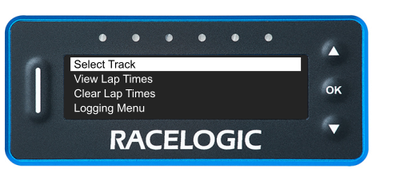
You can access the Settings Menu on the LapTimers by pressing the OK button with the Menu screen on the display. You can navigate the menu with the ▲▼ buttons.
Image missing
You can access the Settings Menu on the LapTimers by pressing the OK button with the Menu screen on the display. You can navigate the menu with the ▲▼ buttons.
Image missing
This menu contains the following sub-menus:
Select Track
View Lap Times
Clear Lap Times
Logging Menu
The Logging Menu contains settings for the Logging Mode, including Minimum Speed and Stop Logging Delay.
Predictive Lap Timing Menu
Contains settings for the Predictive Lap Timing feature, such as Delta-T Bar range, Delta-V light range and the Delta-T speed menu.
Lap Timing Menu
Contains settings for the Lap Timing feature, such as setting and removing splits, saving and loading gates, resetting lap timing data, updating the Tracks Database, split times options, rolling lap time and the gate width.
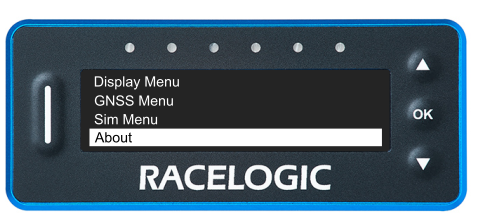
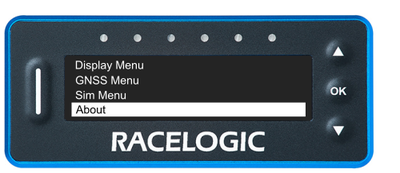
Display Menu
Contains settings for the display behaviours, such as speed units, decimal places and smoothing, speed alerts, accel decimal places and smoothing, screen brightness, LED brightness, display orientation, colour and font options.
GNSS Menu
Contains settings for the GNSS engine, such as the coldstart functionality and the leap seconds.
SIM Menu
Contains settings for using the VBOX LapTimer with the VBOX Sim software.
About
Contains information about the unit, such as the hardware version and serial number, the unit type, the Tracks Database, the GNSS engine type, the GNSS engine version and the GNSS satellite count.

Select Track
View Lap Times
Clear Lap Times
Logging Menu
The Logging Menu contains settings for the Logging Mode, including Minimum Speed and Stop Logging Delay.
Predictive Lap Timing Menu
Contains settings for the Predictive Lap Timing feature, such as Delta-T Bar range, Delta-V light range and the Delta-T speed menu.
Lap Timing Menu
Contains settings for the Lap Timing feature, such as setting and removing splits, saving and loading gates, resetting lap timing data, updating the Tracks Database, split times options, rolling lap time and the gate width.
Display Menu
Contains settings for the display behaviours, such as speed units, decimal places and smoothing, speed alerts, accel decimal places and smoothing, screen brightness, LED brightness, display orientation, colour and font options.
GNSS Menu
Contains settings for the GNSS engine, such as the coldstart functionality and the leap seconds.
SIM Menu
Contains settings for using the VBOX LapTimer with the VBOX Sim software.
About
Contains information about the unit, such as the hardware version and serial number, the unit type, the Tracks Database, the GNSS engine type, the GNSS engine version and the GNSS satellite count.

You can find the full description of all the settings available on the LapTimers in the User Guide.